Frequently Asked Question
Rackspace Enterprise Email Settings IMAP
Last Updated 2 years ago
Windows: Outlook 2013 (IMAP)
This article will assist you with setting up Outlook 2013 with your Hosted Mailbox.
- Open Outlook.
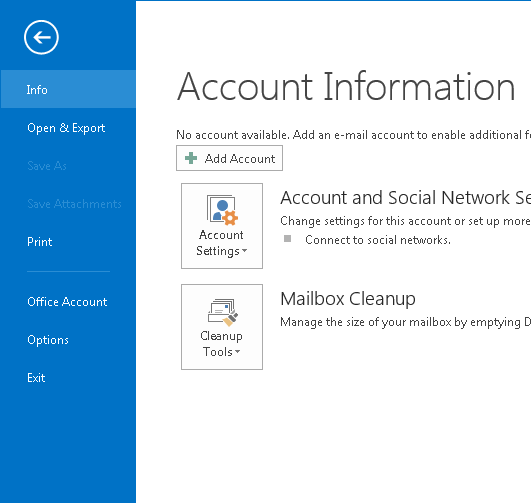
- Select the "File" tab. Then "Add Account".
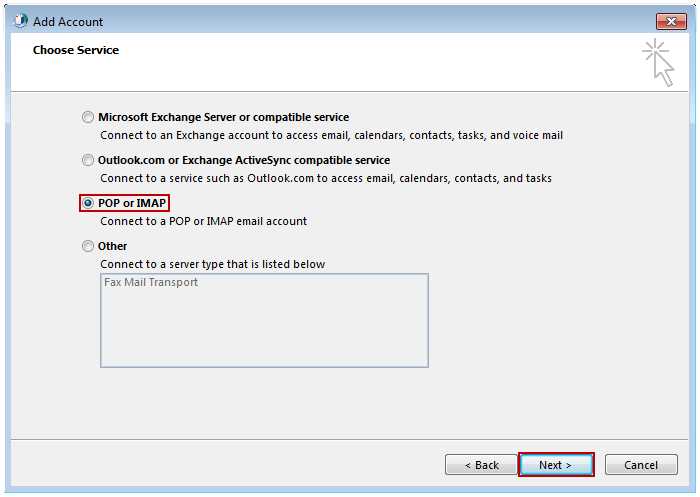
- Select "Manual setup or additional server types". Click "Next". Select "POP or IMAP" and click "Next".
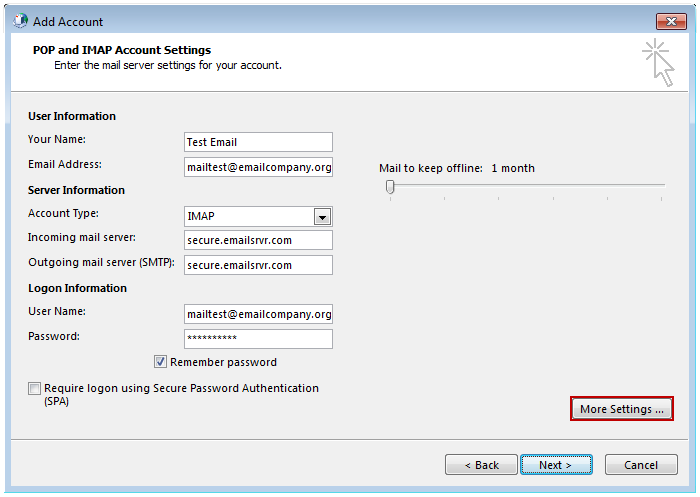
- In the "Add New Account" window, input the following information:
- "Your Name": The name email recipients will see in the "From" field.
- "Email Address": user@yourdomain.com
- "Account Type": IMAP
- "Incoming mail server": (We recommend secure.emailsrvr.com)
Server SSL Port secure.emailsrvr.com Yes 993 imap.emailsrvr.com No 143 - "Outgoing mail server (SMTP)": (We recommend secure.emailsrvr.com)
Server SSL Port secure.emailsrvr.com Yes 465 smtp.emailsrvr.com No 25, 2525, 587, 8025
- "Incoming mail server": (We recommend secure.emailsrvr.com)
- "Logon Information":
- "Username": user@yourdomain.com
- "Password": Your mailbox password
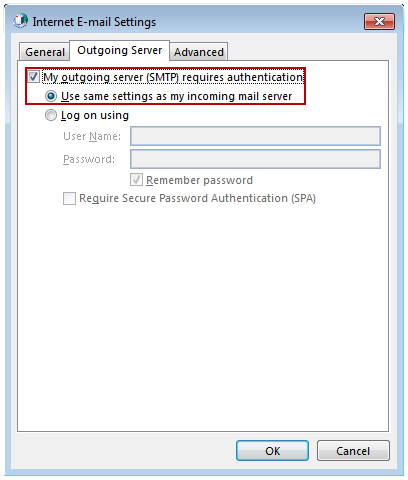
- Click on "More Settings" then click the "Outgoing Server" Tab
- Check the box for "My outgoing server (SMTP) requires authentication".
- Check the button for "Use same settings as my incoming mail server".
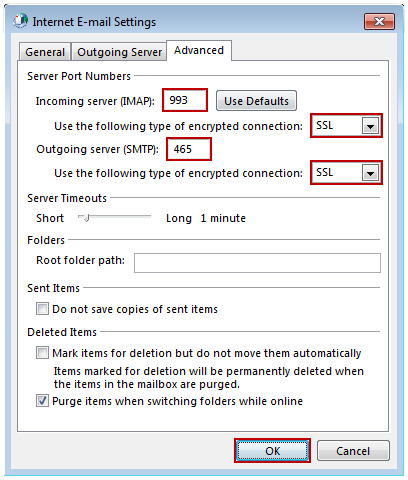
- If using "secure.emailsrvr.com": Click on the "Advanced" Tab
- Change "Use the following type of encrypted connection" to "SSL".
- Change the port numbers to match the chart on step 4.c. Click "OK".
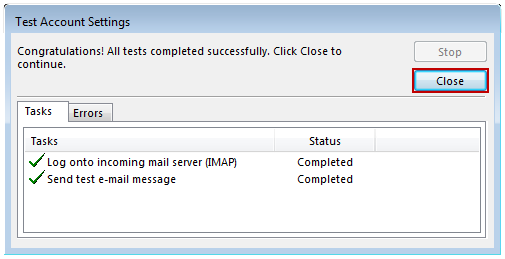
- Click "Next". Outlook will now attempt to send a test message using the settings we have just put in. If everything was entered correctly, the message will send out successfully.
- Congratulations! You have now setup Outlook to work with your Mailbox!
